


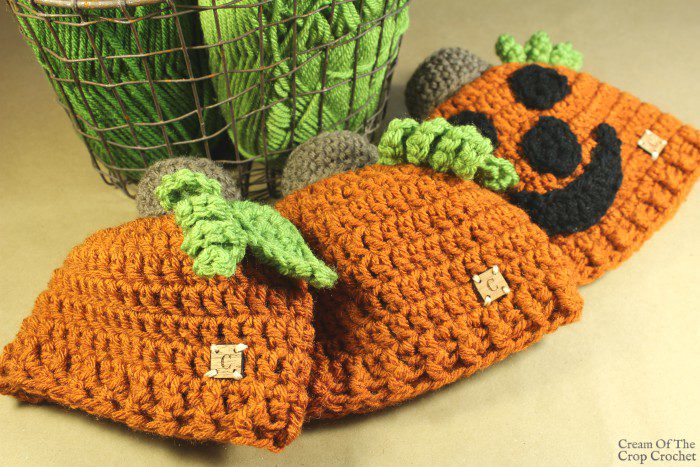
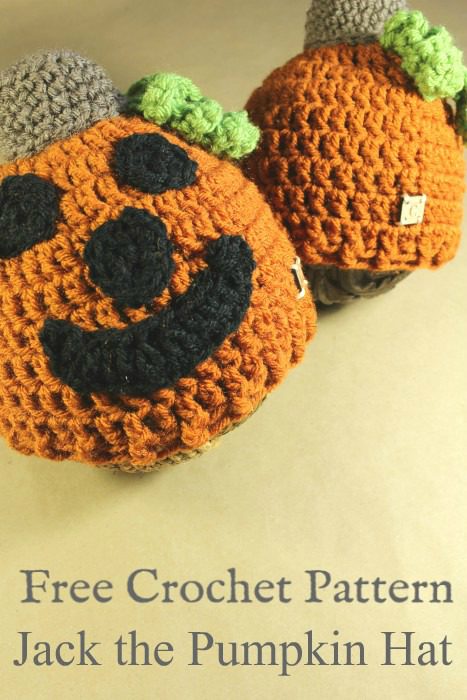
Who would've thought that pumpkins are not just great for recipes and decors, but would make a cute wearable too? This project is a fun one to make for your little ones and stay in theme come fall. Needless to say, this adorable pumpkin hat quickly became a hit with the mom crowd. Check how I made it below, or get the ad-free printable PDF pattern here.
I knew I wanted to make Jack the Pumpkin Hat crochet pattern to have multiple ways to make it, so I think everyone will like what I've come up with. I'm not sure what it is about pumpkins but I just love decorating with them in the fall. They have such a homey feel to them! Not only are they super homey feeling, but they also look adorable as hats.
The Cream Of The Crop Crochet blog started out as a small little business that only a few knew about and quickly turned into a large blog for all to come together. This year we have accomplished many goals together and I can't thank you enough.
If you like supporting small businesses, perhaps you'd like to support one of my great crochet classes. If you enjoy crocheting simple shapes like rectangles, you may want to check out our Crochet Anything with Rectangles class where you'll take the basic shape you already have down pat and turn it into useful, practical, and beautifully professional projects.
Skill Level: Intermediate
Materials:
Hook: US Size J/10 (6 mm) crochet hook or size needed to obtain gauge
Yarn: Worsted weight yarn
50 (65, 70, 90) yds orange (A)
25 yds green (B)
25 yds taupe (C)
25 yds black (D)
Notions
Scissors
Yarn needle
Fiberfill stuffing

Size:
Newborn [3-6 month, 6-12 month, Toddler, Child]
Circumference: 14 [15, 16, 17, 19] inches
Height: 6 [7, 7.5, 8, 8.5] inches
Gauge:
10 dc x 6 rnds = 4 inches.
This pattern uses US crochet terms.
| ABBREVIATIONS | DESCRIPTION |
|---|---|
| blo | Back loop only |
| bpdc | Back post double crochet |
| ch | Chain |
| dc | Double crochet |
| dc2tog | Double crochet 2 together |
| fpdc | Front post double crochet |
| rnd | Round |
| sc | Single crochet |
| sl st | Slip stitch |
| st(s) | Stitch(es) |
Pattern:
Join rounds where indicated with a sl st in the first st of the rnd.
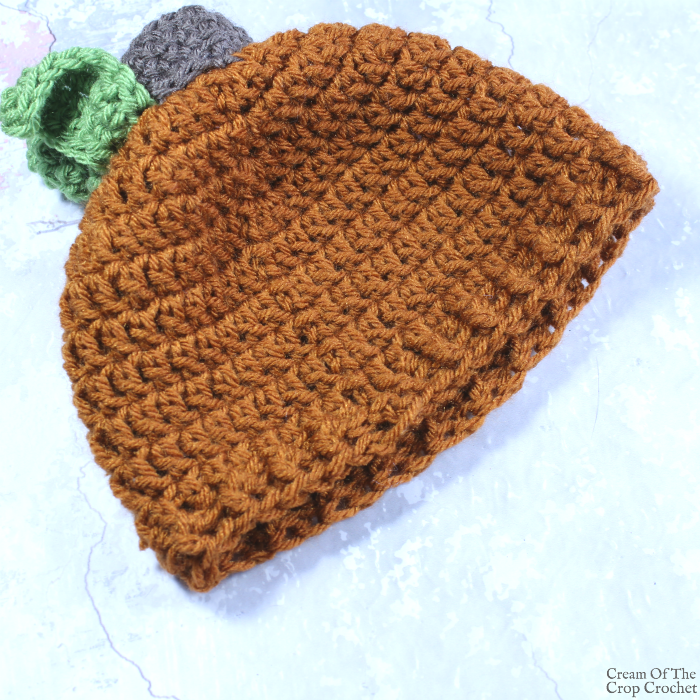
Hat
Crown
With A, ch 3.
Rnd 1: 9 dc in 3rd ch from hook, join. (9 dc)
Rnd 2: Ch 2 (does not count as a st throughout), 2 dc in each st around, join. (18 dc)
Rnd 3: Ch 2, 2 dc in first st, dc in next st, [2 dc in next st, dc in next st] around, join. (27 dc)
Rnd 4: Ch 2, 2 dc in first st, dc in each of next 2 sts, [2 dc in next st, dc in each of next 2 sts] around, join. (36 dc)
3-6 month size only – Rnd 5: Ch 2, 2 dc in first st, dc in each of next 17 sts, 2 dc in next st, dc in each of next 17 sts, join. (38 dc)
6-12 month size only – Rnd 5: Ch 2, 2 dc in first st, dc in each of next 8 sts, [2 dc in next st, dc in each of next 8 sts] around, join. (40 dc)
Toddler size only – Rnd 5: Ch 2, 2 dc in first st, dc in each of next 5 sts, [2 dc in next st, dc in each of next 5 sts] around, join. (42 dc)
Child size only:
Rnd 5: Ch 2, 2 dc in first st, dc in each of next 3 sts, [2 dc in next st, dc in each of next 3 sts] around, join. (45 dc)
Rnd 6: Ch 2, 2 dc in first st, dc in each remaining st around, join. (46 dc)
All Sizes:
Rnds 5-9 [6-10, 6-11, 6-12, 7-13]: Ch 2, dc in each st around, join. (36 [38, 40, 42, 46] dc) Next rnd: Ch 2, fpdc in first st, bpdc in next st, [fpdc in next st, bpdc in next st] around, join. (18 [19, 20, 21, 23] fpdc, 18 [19, 20, 21, 23])
Fasten off.
Weave in all ends.
Get the ad-free printable PDF pattern here.
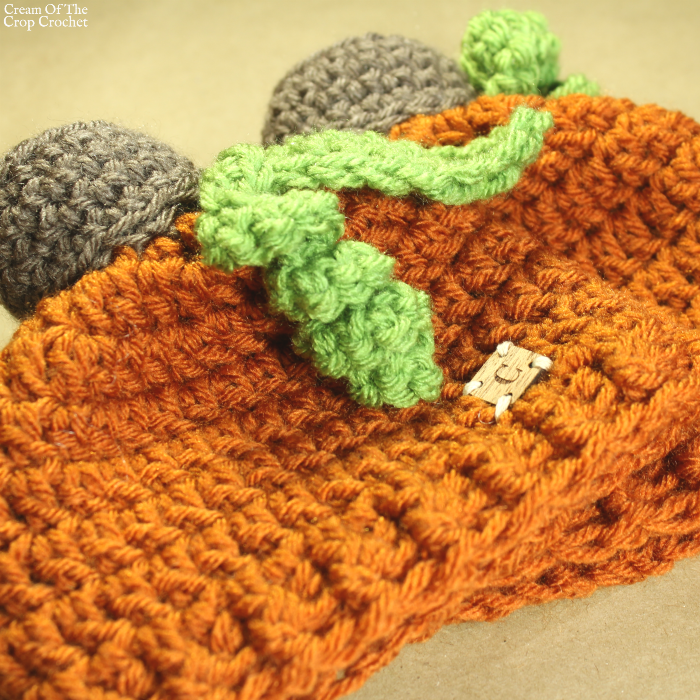
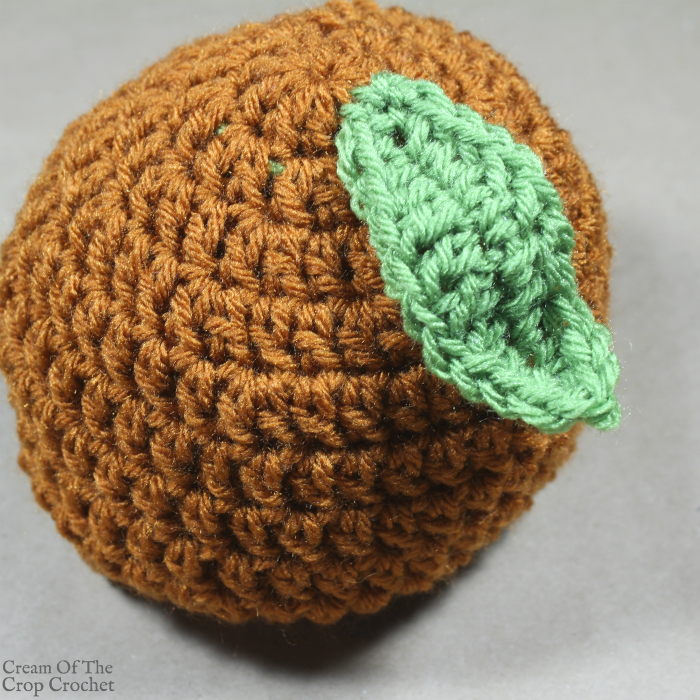
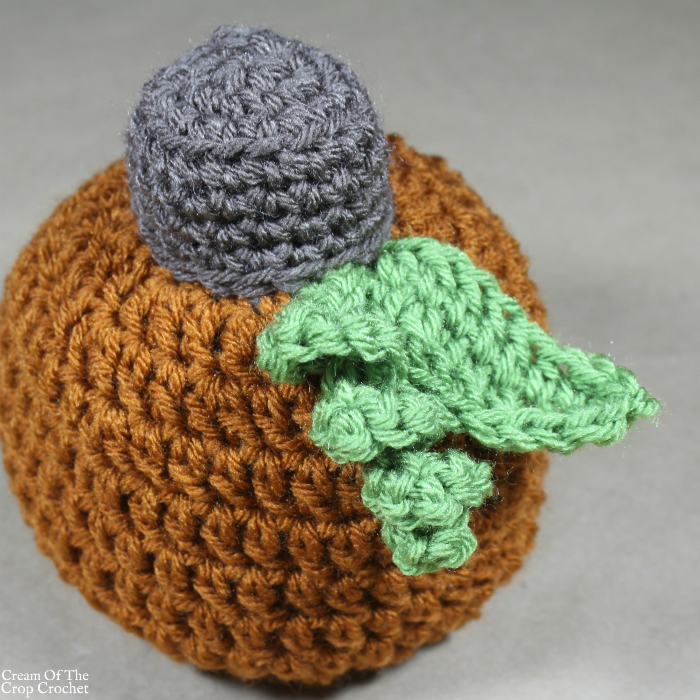
Leaf
With B, ch 11.
Rnd 1: Sc in 2nd ch from hook, *hdc in each of next 2 chs, dc in each of next 4 chs, hdc in each of next 2 chs**, 3 sc in last ch, working on opposite side of ch repeat from * to ** once, sc in last ch, join. (5 sc, 8 hdc, 8 dc)
Fasten off leaving a long tail for sewing.
Using long tail, sew leaf to top of hat.
Weave in ends.
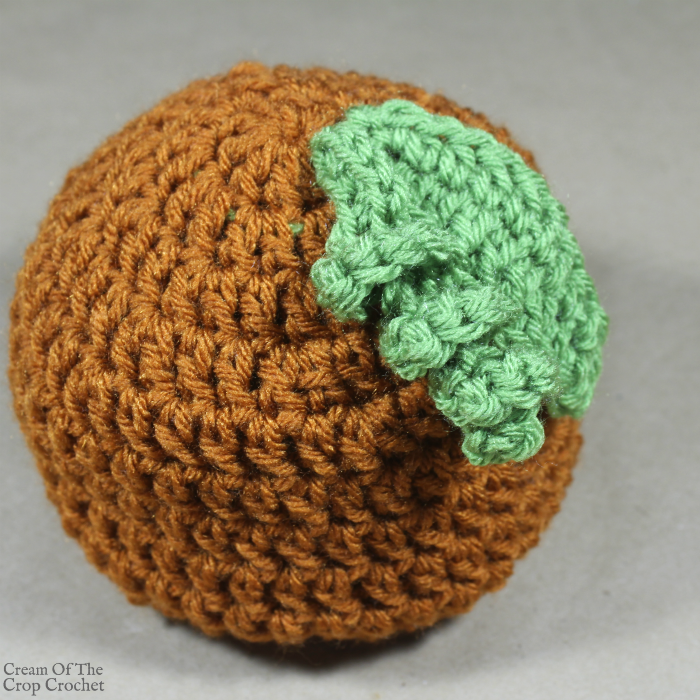
Vine
With B, ch 20
Rnd 1: Working in back bumps of chs, 2 sc in 2nd ch from hook, 2 sc in each ch across. (38 sc) Fasten off leaving a long tail for sewing.
Using long tail, sew vine to top of hat, slightly overlapping leaf.
Weave in ends.
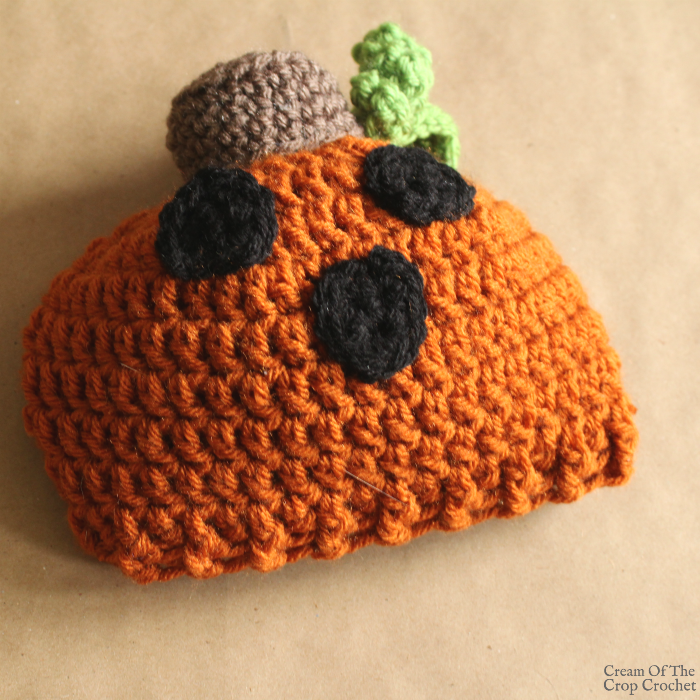
Stem
With C, ch 2
Rnd 1: 6 sc in 2nd ch from hook, join. (6 sc)
Rnd 2: Ch 1, 2 sc in each st around, join. (12 sc)
Rnd 3: Ch 1, 2 sc in first st, sc in next st, [2 sc in next st, sc in next st] around, join. (18 sc)
Rnd 4: Ch 1, sc in blo of each st around, join. (18 sc)
Rnds 5-7: Ch 1, sc in each st around, join. (18 sc)
Fasten off, leaving a long tail for sewing.
Weave in starting end.
Stuff stem with fiberfill.
Using long tail, sew stem to top center of hat, overlapping the leaf and vine.
Weave in ends.
Get the ad-free printable PDF pattern here.
Eyes and Nose (Make 3)
With D, ch 2.
Row 1: Sc in 2nd ch from hook. (1 sc)
Row 2: Ch 1, turn, 2 sc in first st. (2 sc)
Edging: Ch 1, turn, sc in each st, 3 sc in corner, [working in sides of rows sc in each row, 3 sc in corner] twice, join. (15 sc)
Fasten off leaving a long tail for sewing.
Using long tails, sew eyes and nose to one side of hat.
Weave in ends.
Smile
With D, ch 13.
Row 1: Working in back bumps of chs, sc in 3rd ch from hook, dc in each of next 3 sts, [dc2tog in next 2 sts] twice, dc in each of next 3 sts, ch 3, sc in 3rd ch from hook, sl st in last dc of row. (2 sc, 6 dc, 2 dc2tog, 2 ch-2 sps)
Fasten off, leaving a long tail for sewing.
Using long tail, sew smile in place below nose.
Weave in all ends.
If you're looking to add a new repertoire of stitches to your knowledge base, you have to check out the Ultimate Crochet Stitch Library. You'll have all the stitches you need to crochet anything you've ever wanted to. These are the foundational stitches for the majority of patterns out there!

Do you remember the old pattern of a doll (Barbie size) with a huge full skirt and a bodice to put at pillows on a bed? Is that and intermediate or advance crocheting or can a newbie handle it? Where can I get that pattern?
thank you
Paulette
Beautiful and clever
Thank you!
These are adorable !